
VuePress 테마 설정
현재 페이지는 VuePress에서 Theme를 다루는 방법에 대해 기술한 내용이다.
Using Theme
테마는 직접 만들 수도 있고, 다른 사람이 만든 테마를 다운받아 사용할 수도 있다.
테마와 관련된 설정은 기본적으로 .vuepress/config.js 에 입력하면 된다.
// .vuepress/config.js
module.exports = {
  theme: 'vuepress-theme-테마이름'
}
prefix가 vuepress-theme- 일 경우, 생략할 수 있다.
// .vuepress/config.js
module.exports = {
  theme: '테마이름' // 'vuepress-theme-테마이름' 을 가져온다.
}
참고로, vuepress의 기본 테마는 node_modules/@vuepress/theme-default 에 들어있으며,
config.js에 theme를 지정하지 않으면, default는 @vuepress/theme-default 이다.
Vuepress Theme 직접 만들기
테마를 직접 만드는 방법은 매우 간단하다. .vuepress/theme 폴더를 만들고, 가이드라인대로 파일 및 폴더를 구성하면 된다.
.
└─ .vuepress
│  └─ theme
│     └─ Layout.vue
└─ README.md
그리고 Layout.vue 에 <Content /> 라는 component를 사용하면, *.md 파일의 내용이 보여지게 된다.
<template>
  <div class="theme-container">
    <Content/>
  </div>
</template>
README.md에 있는 내용이 다음과 같다고 했을 때
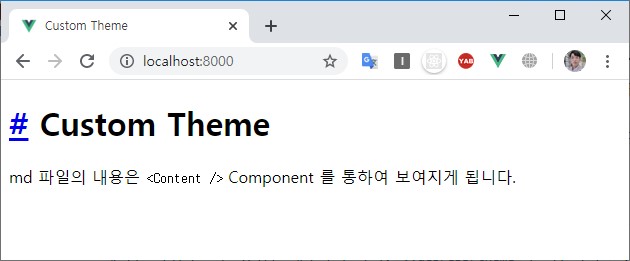
# Custom Theme
md 파일의 내용은 `<Content />` Component 를 통하여 보여지게 됩니다.
결과 화면은 이렇게 나온다.
모든 *.md 파일은 <Content /> Component에 mapping 된다.
Theme Directory Structure
theme
├─ global-components
│   └─ xxx.vue
├─ components
│   └─ xxx.vue
├─ layouts
│   ├─ Layout.vue (Mandatory)
│   └─ 404.vue
├─ styles
│   ├─ index.styl
│   └─ palette.styl
├─ templates
│   ├─ dev.html
│   └─ ssr.html
├─ index.js
└─ enhanceApp.js
상세 설명
theme/global-components이 디렉토리의 component는 자동으로 global component로 등록됨.
* 참고링크theme/componentscomponent 등록theme/layoutsLayout.vue가 기본 component 가 되고, 404.vue는 404 page에 대한 component 가 됨theme/stylesindex.styl과 palette.styl을 기본으로 불러옴. 나머지는 작성하기 나름theme/templates기본 템플릿theme/index.js테마 구성의 entry 파일theme/enhanceApp.jsVue plugin을 설치하거나 전역 구성 요소를 등록하거나 라우터 후크 추가 가능
Layout.vue 는 항상 필요하지만, 다른 것들은 필요할 때 추가하면 된다.
VuePress 관련 computed 변수
VuePress에는 default theme 또는 custom theme에 사용하기 위해 global computed가 내장되어 있습니다.
자세한 내용은 공식문서 에서 확인할 수 있고, 일단 핵심적으로 사용되는 변수만 나열하면 다음과 같다.
$site
site의 title description base pages 등을 가져온다.
{
  "title": "VuePress",
  "description": "Vue-powered static site generator",
  "base": "/",
  "pages": [
    {
      "lastUpdated": 1524027677000,
      "path": "/",
      "title": "VuePress",
      "frontmatter": {}
    },
    ...
  ]
}
$page
현재 페이지에 대한 정보를 가져온다.
{
  "title": "Global Computed",
  "frontmatter": {},
  "regularPath": "/guide/global-computed.html",
  "key": "v-d4cbeb69eff3d",
  "path": "/guide/global-computed.html",
  "headers": [
    { "level": 2, "title": "$site", "slug": "site" },
    { "level": 2, "title": "$page", "slug": "$page" },
    ...
  ]
}
$themeconfig
config.js의 themeConfig를 가져온다.
Theme를 직접 만들 때의 문제점
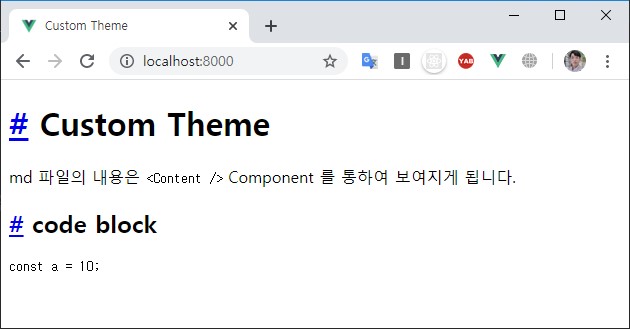
Theme를 직접 만들면 default theme에서 제공하는 style과 plugin을 사용할 수 없기 때문에 code block 이나 markdown 등을 새롭게 꾸며줘야 한다.
예를들어 code block을 입력하면 다음과 같이 날 것(?) 으로 출력된다.
# Custom Theme
md 파일의 내용은 `<Content />` Component 를 통하여 보여지게 됩니다.

## code block

```js
const a = 10;
```
이에 대한 방안 중 하나는 default-theme의 style을 가져다 사용하는 것이다.
<template>
  <div class="theme-container">
    <Content class="theme-default-content" />
  </div>
</template>
<style lang="stylus" src="@vuepress/theme-default/styles/index.styl"></style>

하지만 default-theme에서 지원하지 않는 것들을 일일히 찾아서 수정하는 것은 번거롭기 때문에, Theme를 처음부터 만드는 것 보단 default theme를 extend 하여 사용하거나 eject 사용 하는 것이 좋다.
Theme Extend
theme를 extend 하는 방법도 매우 간단하다. .vuepress/theme/index.js 에 다음과 같이 작성하면 된다.
// theme/index.js
module.exports = {
  extend: '@vuepress/theme-default',
  globalLayout: '/layouts/GlobalLayout'
}
GlobalLayout.vue 도 만들어줘야 한다.
<template>
<div id="global-layout">
<component :is="$page.path ? 'Layout' : 'NotFound'" />
<footer class="siteFooter">
© 개발자 황준일
</footer>
</div>
</template>
위와 같이 구성했을 때, 폴더 구조는 다음과 같다.
.
└─ .vuepress
│  └─ theme
│     ├─ layouts
│     │ └─ GlobalLayout.vue
│     └─ index.js
└─ README.md
결과를 확인해보면, footer가 추가된 것을 볼 수 있다.
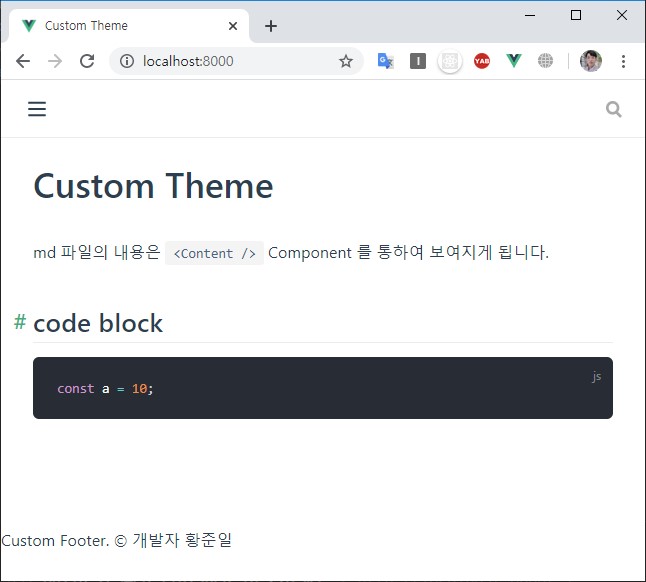
여기서 .vuepress/styles/index.styl .vuepress/styles/palette.styl .vuepress/config.js 등의 파일을 만들고 약간의 입력을 통하여 조금 더 세련되게 꾸밀 수 있다.
TIP
index.styl은 전역에서 사용되는 stylesheet 이며, pallete.styl은 vuepress에서 사용하는 color들의 변수들을 담고 있다.
다음은 default로 입력되어있는 pallete.styl 의 내용이다.
// showing default values
$accentColor = #3eaf7c
$textColor = #2c3e50
$borderColor = #eaecef
$codeBgColor = #282c34
$badgeTipColor = #42b983
$badgeWarningColor = darken(#ffe564, 35%)
$badgeErrorColor = #DA5961
변경될 구조
.
└─ .vuepress
│  ├─ config.js
│  ├─ styles
│  │  ├─ index.styl
│  │  └─ palette.styl
│  └─ theme
│     ├─ layouts
│     │ └─ GlobalLayout.vue
│     └─ index.js
└─ README.md
config.js index.styl palette.styl 추가
.vuepress/config.js
module.exports = {
  title: 'VuePresesThemeCustom',
  description: '테마 커스텀하기',
  themeConfig: {
    search: false, // 검색은 사용하지 않는다.
    logo: 'https://avatars0.githubusercontent.com/u/18749057?s=120&v=4', // logo 이미지
    nav: [
      { text: 'Home', link: '/' }, // 상단 메뉴
    ],
    sidebar: 'auto', // 사이드바 사용 여부. auto로 하면 content의 내용이 반영된다.
    smoothScroll: true // 부드러운 스크롤 사용 여부
  }
}
config에 대한 내용은 공식문서를 참고하면 된다.
.vuepress/styles/index.styl
// font는 noto serif kr 을 기본으로 사용하도록 한다.
@import url('https://fonts.googleapis.com/css?family=Noto+Serif+KR&display=swap');
body
  font-family 'Noto Serif KR', serif, Nanum Gothic, Malgun Gothic, -apple-system, BlinkMacSystemFont, 'Segoe UI', Roboto, Oxygen, Ubuntu, Cantarell, 'Open Sans', 'Helvetica Neue';

h1
  color $accentColor

// 직접 만든 footer를 꾸미자
.siteFooter
  background #242729
  padding 30px 0
  font-size 13px
  color #848d95
  text-align center

// sidebar를 꾸며보자
.sidebar
  background none
  border-right none
  bottom none
  left calc(50% + 450px)
  &-link
    &.active
      border-left none

.page
  padding-left 0
.vuepress/styles/palette.styl
$accentColor = #1b52eb
accentColor는 기본 point 이다. 기본에는 초록색이였음.
결과화면
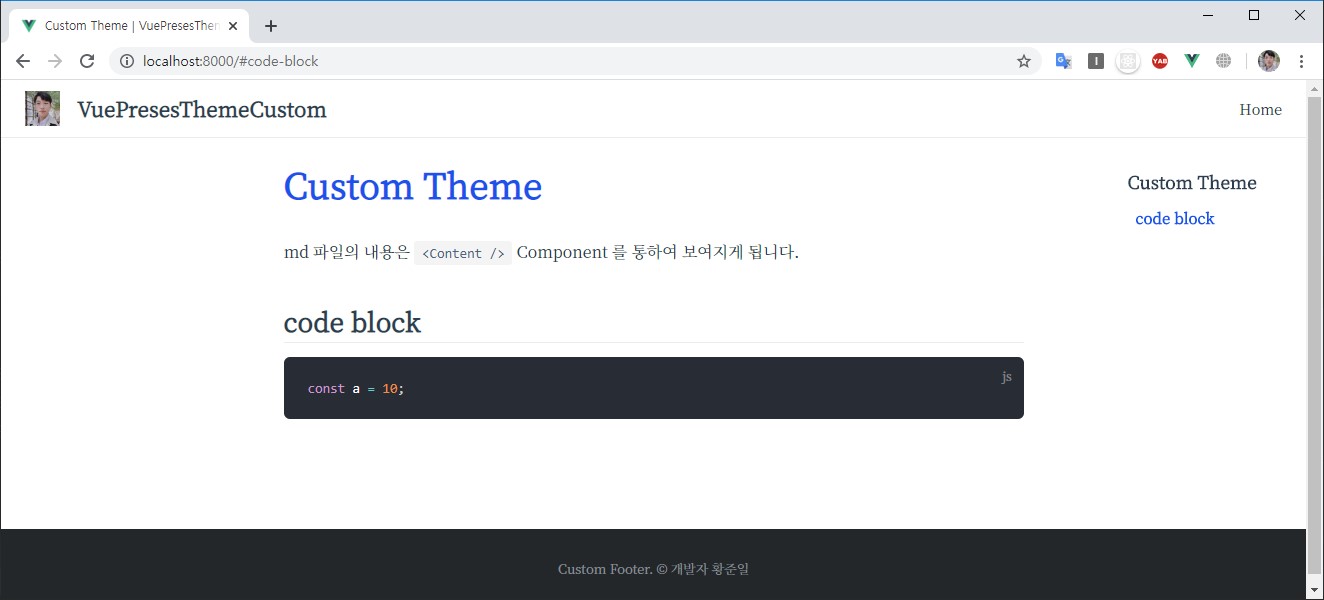
조금만 손봤을 뿐인데 깔끔하게 만들어진 것을 확인할 수 있다.
Theme Eject
아예 Default Theme를 가져와서 직접 수정할 수도 있다.
package.json 에서 npm scripts로 eject 명령을 추가해보자.
// pacakge.json
{
  "name": "vuepress-stater",
  "version": "1.0.0",
  "main": "index.js",
  "license": "MIT",
  "scripts": {
    "docs:dev": "vuepress dev --port 8000",
    "docs:build": "vuepress build",
    "docs:eject": "vuepress eject"
  },
  "devDependencies": {
    "vuepress": "^1.0.0-rc.1"
  }
}
그 다음에 terminal에서 yarn docs:eject 를 실행하면 된다.
yarn docs:eject
그러면 .vuepress/theme 폴더에 @vuepress/theme-default의 있는 파일들이 복사된 것을 확인할 수 있다.
theme
├─ components
│  ├─ Home.vue
│  ├─ Navbar.vue
│  └─ ...(기타 components)
├─ global-components
│  └─ Badge.vue
├─ layouts
│  ├─ Layout.vue
│  └─ 404.vue
├─ styles
│  ├─ index.vue
│  └─ ...(기타 styles)
├─ util
│  └─ index.js
├─ index.js
├─ LICENSE
└─ noopModule.js
이제 이 theme-default 의 내용을 기반으로 직접 수정하면 된다.